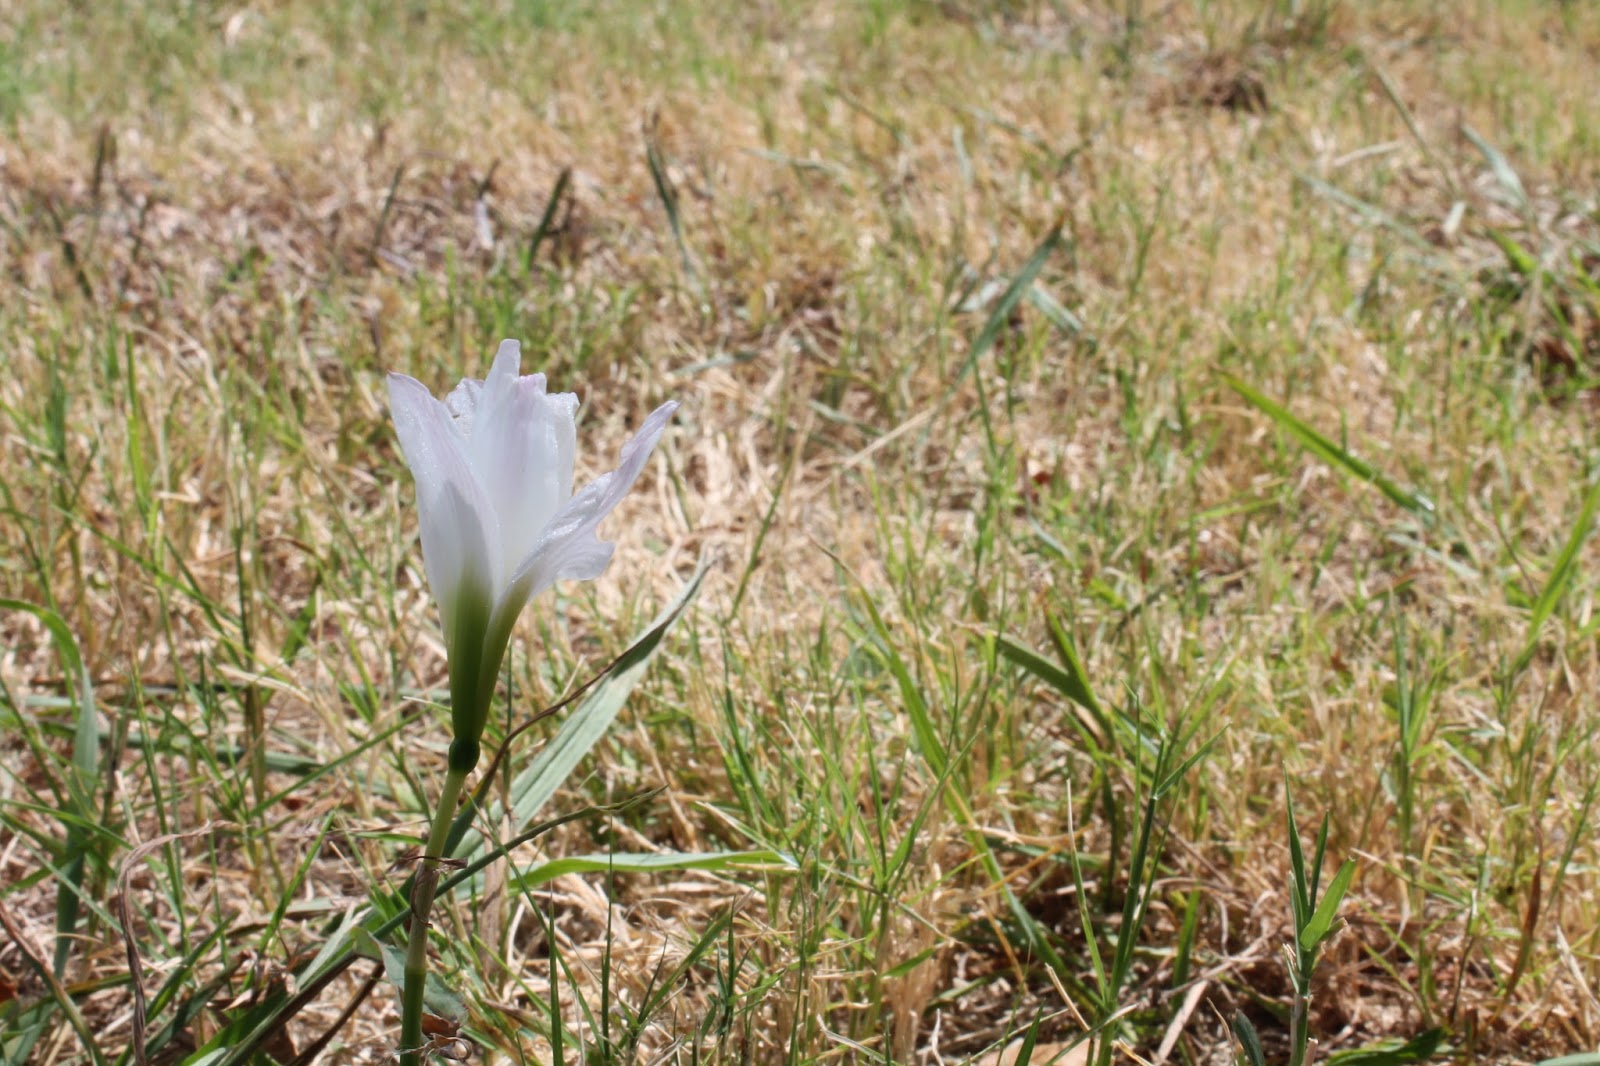
Friday, September 26, 2014

Free Shoot Planing


the subjects in my photographs would be my dogs for just some and some of me and my dogs,
I'm going to try to shoot it in the park or woods close to my home and in my home, mostly outside and in the afternoon or day time when its not too bright and not dark. I'm going to use natural lighting from the sun. the only thing ill be need the camera and a 50mm lens or wide angle lens.
 I'm going to try to as many photos as i can take that are good.

Wednesday, September 24, 2014

Lightroom Presets


i would like to try out this preset here ,it doesn't really have a name its just called preset 350 of 365

this is the picture that i took and used a preset to change my picture, i used B&W creative - High contrast. i chose this one because it makes the picture look better, it makes it sharper and changes it to black and white,  really liked how it turned out.

Monday, September 22, 2014

First Export

The subject in this photo is the yellow balloon with the smiling face

The subject in this photo is the blue star hanging from the ceiling 

 The subject in this picture is the gold glittery star in the white balloon

I'm happy with how the pictures turned out after i used Lightroom to edit them they look more vibrant and true to their natural colors.

i think that next time i would probably try to take pictures that are more interesting and better thought out.

i learned that even though the picture doesn't look too good from the camera itself that if you shoot in raw you can edit and mess with the settings to fix it and make it look better.

Thursday, September 18, 2014

RAW versus JPEG Format in photography


Advantages of RAW:

  1. Higher in dynamic range 
  2. Uncompressed 
  3. The complete data from the camera’s sensor. 
Disadvantage of RAW:
  1. Not as sharp 
Advantages of JPEG:
  1. A standard format readable by any image program 
  2. Higher in contrast 
  3. Sharper.  

Disadvantage of JPEG:
  1. Lower in dynamic range 
A JPEG file is the most common and easies to use file type that has very little disadvantages, the file size is compressed and is sharper and higher in contrast.


A RAW file is the complete file size of the picture, although it has many disadvantages such as not being as sharp and lower in contrast and is higher in dynamic range which is good to capture good details such as highlights and shadows.
  1. It captures all the data and retains all the information without compressing it 
  2. You have control over the compression of the final image,have control over things like white balance, contrast, highlights, shadows, colours and saturation 
  3. You can convert RAW images to JPEG, but you can’t convert the other way,RAW files are significantly larger than JPEG files, so the space on your memory card won’t have the capacity for as many shots 
  4. They would need to know how to work with RAW files because they would be alble to have more options when editing the picture and they would have control of basically everything. 
Better for RAW
  1. Weddings 
  2. Magazine/Modeling shoots 
  3. Landscapes 
Better for JPEG

  1. Sporting events 
  2. Vacations 
  3. News articles 

Tuesday, September 16, 2014

Sunny 16 Rules Notes

In order to be able to take clear pictures you need to know how to use the sunny 16 rule in order to get the best exposure to take the best pictures


the proper exposure is determined by the iso of the film/sensor setting

in the funny 16 rule the goal is to get the pictures to have an equal exposure.
so if you start at f16 and shutter speed 1/125and if you move it up one full f stop it would be f11 and the equivalent shutter speed would be 1/250, if you move it down one full f-stop it would be f22 and equivalent shutter speed would be 1/60.

although the exposure would be the same the picture can till change from sharpness of the background and depth of field, it can also become more or less grainy depending on the settings you choose.

Monday, September 8, 2014

FlipWork: Aperture, Shutter speed, and ISO

Aperture 


picture taken at F2.8


picture taken at F16 


1. Aperture is compared to the iris of the eye. 
2. The smaller the aperture the greater the depth, the higher the aperture the smaller the depth. 3. Aperture impacts depth of field by making the main subject sharp and the background blurry during a large f-stop and the opposite during a small f-stop.


Shutter Speed 

picture taken at fast shutter speed 


Image taken at slow shutter speed 


At the beginning while the sun is still partially up and the courtyard has reasonable light:
a.) the dunking booth- High Shutter Speed
b.) the food eating contest- High Shutter Speed
c.) the rock climbing wall- High Shutter Speed
d.) someone working at a booth- Slow Shutter Speed
e.) the DJ/MC working at the middle of the circle- Slow Shutter Speed
f.) the Diamonds performance- High Shutter Speed


Towards the end when there is no sun and has gotten dark enough that you can't see from one end of the courtyard to the other.
a.) The dunking booth - High Shutter Speed
b.) The food eating contest - Slow Shutter Speed
c.) The rock climbing wall - Slow Shutter Speed
d.) Someone working at a booth - Slow Shutter Speed
e.) The DJ/MC working at the middle of the circle - Slow Shutter Speed
f.) The Diamonds performance - High Shutter Speed


Auto - The camera selects what the shutter speed will be depending on it's surroundings.
Aperture Priority - You can change the aperature manualy but the camera changes the shutter speed Automatic Manual - You can change both aperature and shutter speed by hand


Image taken at ISO 200


Image taken at ISO 3200


1.It will be easier to capture the moving objects of the players in action.
2. If you have your camera mounted on a tripod or sitting on a flat surface. Your camera will most likely need more time to capture the scene and anything that is moving is probably going to look like a ghost.
3. To set my ISO to a higher number to be able to freeze motion
4. the available ISO's on the cameras here are ISO's 100, 200,400,800,1600,2300 and ISO 6400
--------------------------------------------------------------------------------------------------------------------------------------------------

F4 - 1/250: The background is blurry
F5.6 - 1/60: The background is less blurry
F8 - 1/60: The background is less blurry
F11- 1/60: The background is more clear
F16- 1/30: It's the same the background
F22 - 1/8: When the background is more clear and blurry.


At slow shutter speed people are blurry.
A higher shutter speed will solve the problem.
The lowest shutter speed is 1/40.

Thursday, September 4, 2014

composition shoot

1. Rule of thirds
 
 
2. Balancing Elements
 
 
3. Leading Lines
 
 
4. Symmetry and Patterns (repetition)
 
 
5. Viewpoint
 
 
6. Background
 
 
7. Create depth
 
 
8. Framing
 
 
 9. Cropping (Filling the frame)

10. Mergers (on purpose or by mistake).


Tuesday, September 2, 2014

Photo composition flipped work

1. Rule of thirds


2. Balancing Elements


3. Leading Lines


4. Symmetry and Patterns (repetition)


5. Viewpoint


6. Background


7. Create depth


8. Framing


9. Cropping


10. Mergers and avoiding them